DIY Latex Vacuum Bed – Detailed Guide on Making Your Own

5.6K
I had written an article on latex vacuum beds before – and I’ve wanted one ever since. However, nearly every model’s price tag made me cry. They’re SO expensive. Even the few DIY kits out there are a lot.
I mean, I get it – they’re running a business and things cost money, but when I looked at the materials to make one myself, I saw just how much of a markup customer’s are paying.
And what are you paying for?
Time.
It’s mostly people’s time to make it.
This is good news – because if you’re A. not scared of making things yourself and B. willing to put in about three days of work (on and off), you can have your own.
Here’s a detailed guide (plus suggestions from my own mistakes) on how to make your own.
MATERIALS LIST
Some of your base materials will be things you buy once and don’t have to repurchase for a while (like a rotary cutter). Others will be consumed during the project (like glue). Also, if you are lucky enough to have someone to borrow these things from, you will save even more money.
► LATEX – You want 0.4mm thickness, 5-6 meters long and 1 meter wide (in whatever color you want). Don’t go thicker. It won’t mold to the body as well. And don’t go thinner because it will be harder to work with (especially if you haven’t glued latex before).
I bought mine from RadicalRubber.com (they had excellent customer service).
NOTE: There are places that sell them wider, but it’s far more expensive and you can get by with one meter no problem for a normal, one-person bed.
► ROTARY CUTTER x1 – A round blade that helps you cut through the latex without creating ragged/weak points along the seam. Amazon or craft stores have them. I found mine in a hardware store.
► SCISSORS x1 – Sharp ones to help you cut the breathing holes and valve holes or patches.
► SEAM ROLLER x1 – To press down the latex after you’ve glued it. Amazon or leatherworking stores will have them.

The standard is solvent-based rubber cement that produces a strong bond between natural latex sheets. You can use water-based as well, but the bond will be weaker (better suited for stuff what won’t stretch or be stressed that much).
There are MANY brand names and suggestions out there (not all are going to have a quality, long-term bond for your projects). Here are some brands or words you’ll hear in your searches…
- Bostik 3851 Rubber Solution Adhesive is a European brand
- Best-Test White Rubber Cement (not PAPER cement)
- Sometimes called Vulcanizing glue
- Water-based latex glue is also called Liquid Latex
- Another water-based brand is Copydex (also good for prepping zippers)
If you’re not sure, I suggest buying the glue from the latex distributor – you’ll be paying a mark-up but they will have the correct stuff. I got mine at Latexpermeter.com but MJ Trends or Radical Rubber (water-based one) also has it. If you want large quantities, you can ask them for a discount for bigger purchases or just ask them where they buy theirs.
IMPORTANT: Bad glue will discolor or eat away at the latex over time. Chlorinated solvents such as trichloroethylene could harm the latex. Most hardware store products are not good. If you want something for a one-time-use (any latex glue is fine), but if you want it to last longer, get the better stuff.
► SOLVENT – This is meant to clean and de-grease your seams before you glue anything (and provides a better bond). Keep in mind that some solvents cannot be shipped out of the country, so pay attention to shipping and product details.
HEPTANE or BESTINE based solvents will work. If you’re not sure, you can also buy these off of the latex distributor’s site as well. I got mine from Latexpermeter.com.
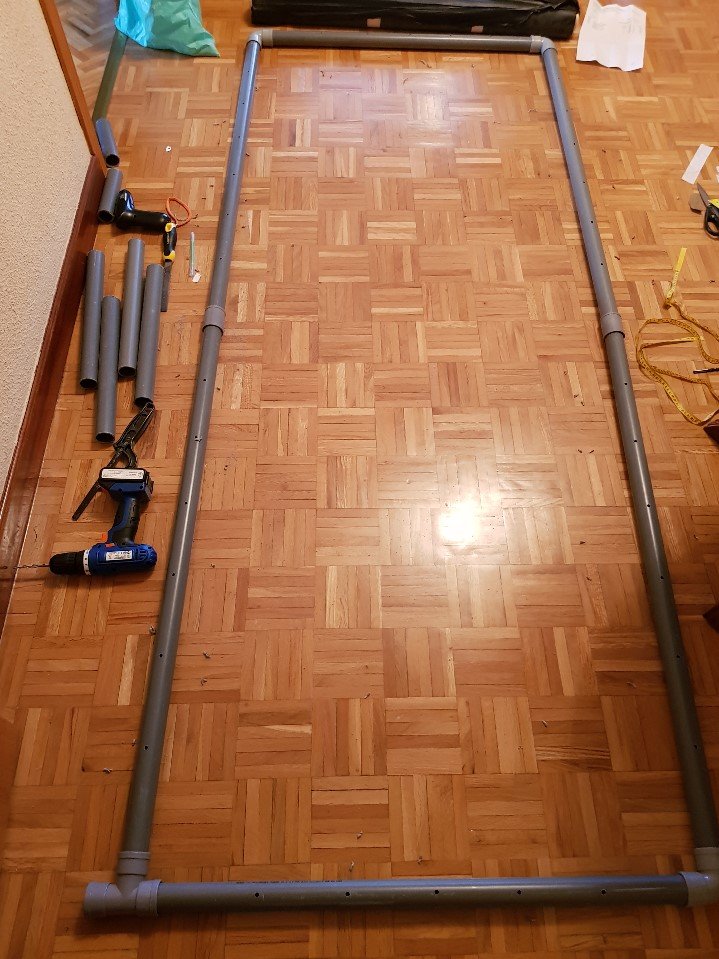
► WASTE PIPES x4/6 – This will make your bed frame. You can either have 4 pieces (stronger frame) or 6 pieces (easier to store and transport) of PVC waste piping. You want the “inflexible” pipes. I recommend you go to a hardware store to look at them in person and see if they are light yet strong enough. They can also cut them at any length you want.
- 2 lengths of 84cm (top and bottom)
- 4 lengths of 115cm (sides)
- OR 2 lengths of 230cm*
IMPORTANT: You can adjust the “long” sides to whatever length you want based on how tall you or your users will be. You’ll just have to make sure you have enough latex.
The WIDTH, however, is not really adjustable with a 1m (wide) sheet of latex … 84cm is because the fittings will add extra width, PLUS the latex seams will have around a 1.5 cm overlap. It will leave just enough room to slide the frame into the latex “pocket” or “envelop” you’ll make.
► CONNECTORS x4/6 – These will keep your frame together.
- 3 x 90-degree elbow fittings
- 1 x Tee fitting
- *2 x Straight connector (if you have 4 pieces in your frame)
Make sure you buy ALL your pipes and fittings at the same place so you can physically put them together to make sure they fit.
LEARN FROM MY MISTAKE: The straight connector was a bit too short and allowed the 4-piece frame to buckle a little when the bed is turned on. It also makes it harder to keep the pipes in place. I had to duct tape mine together to make them stay (it was still functional, just a bit ugly and annoying). If you can find longer connectors, GET THEM.
► VALVE x1 – This controls the air going in and out. Keep in mind the value should be able to turn on/off and be “air tight”. Also, how many pieces it involves depends on where you buy it or what’s available.
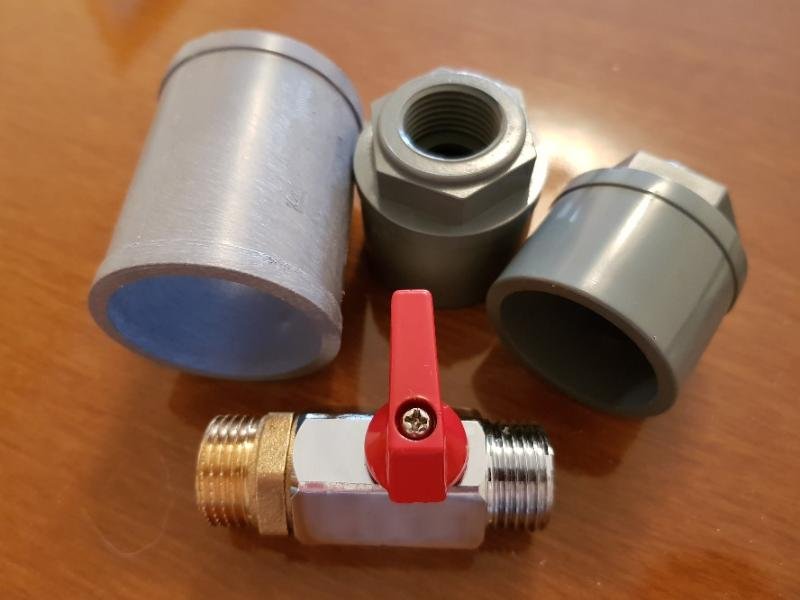
This is what the guy at the hardware store suggested to me.
► SAW x1 – I got my pieces slightly longer than necessary – just to make sure there were no issues when I compared the measurements to the size of the latex. If you do it this way, you’ll need a saw to cut of the excess.
► FILE x1 – One video suggested using a file to scrape off any sharp, rough, or raised bits on the connectors or pipes. This reduces any chances of ripping.
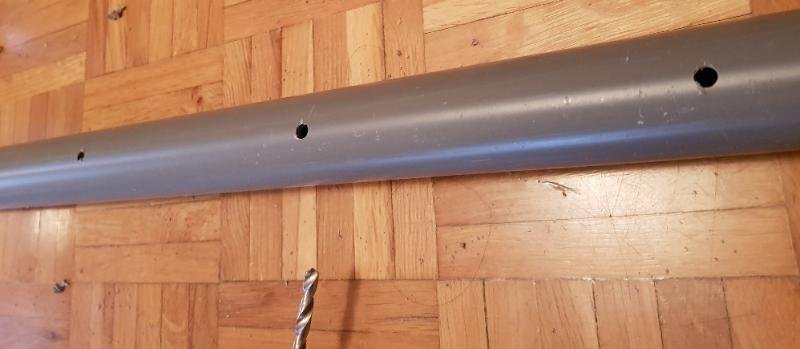
► DRILL x1 – You need to drill holes along the pipes to allow the air to come in and out. Make sure you have a drill bit that’s for METAL not wood. If you can borrow one, you’ll save money – but I managed to buy one for around 30 Euros and the drill bit was 1.5 Euros.
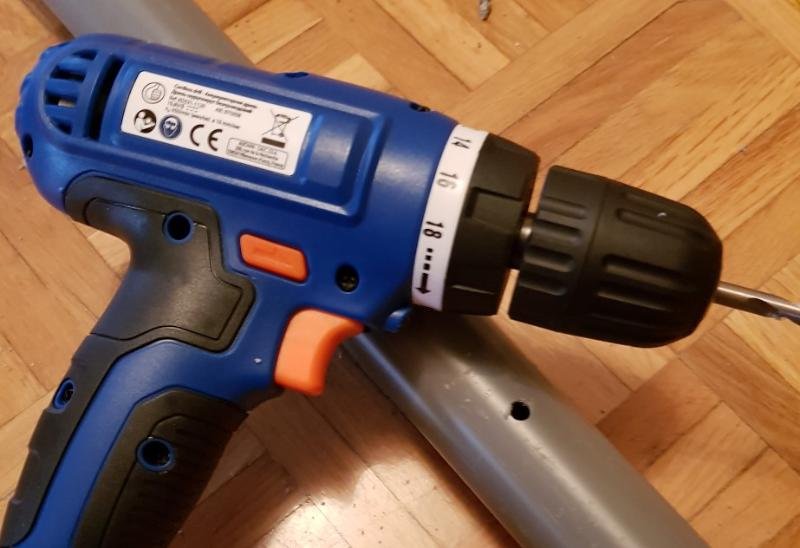
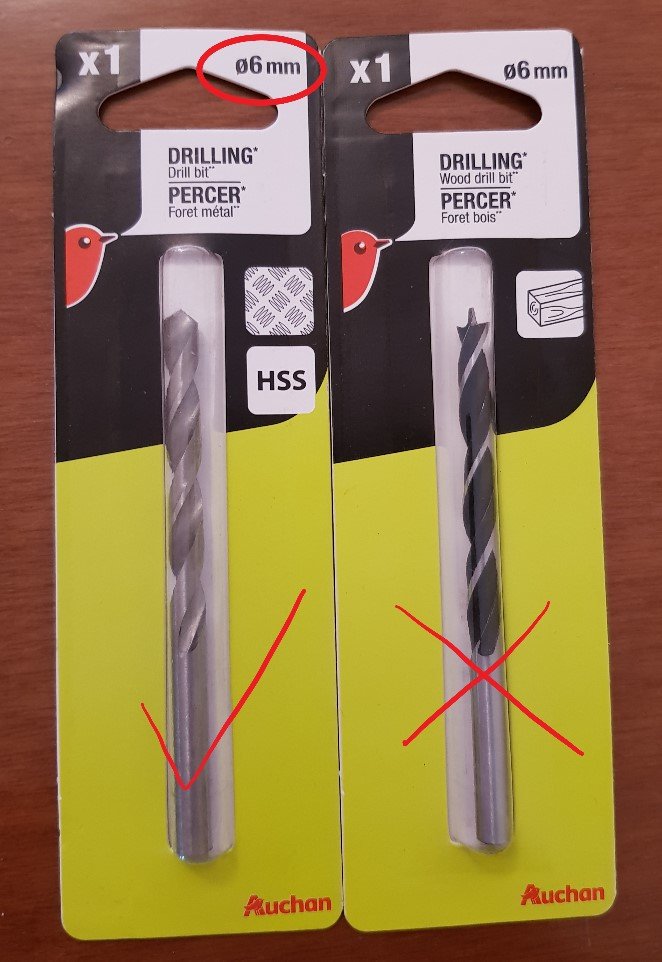
Don’t get the ones for wood. 5-6mm will work fine.
► CUTTING BOARD x1 – This can be a self-healing craft board or just cardboard. Anything that can take the damage and dirt of construction. I actually didn’t use this but many people do.
► GLUE BOARD x2 – I used paper to protect my latex while I was gluing, but that leaves bits of paper stuck to my project. You can get smooth, thin, plastic cutting boards instead.
► CREDIT CARD OR BUSINESS CARD x1 – Helps spread the glue on the latex. Free, search your house.
► COTTON BUDS x1 bag – Used to clean the latex before gluing. Just get a bag at a dollar store. They’re useful for everything.
► GEL PEN – A gel pen will let you put on glue marks (to make sure you don’t stretch the latex too far while gluing). they come off easily with solvent. Free from work or friends.
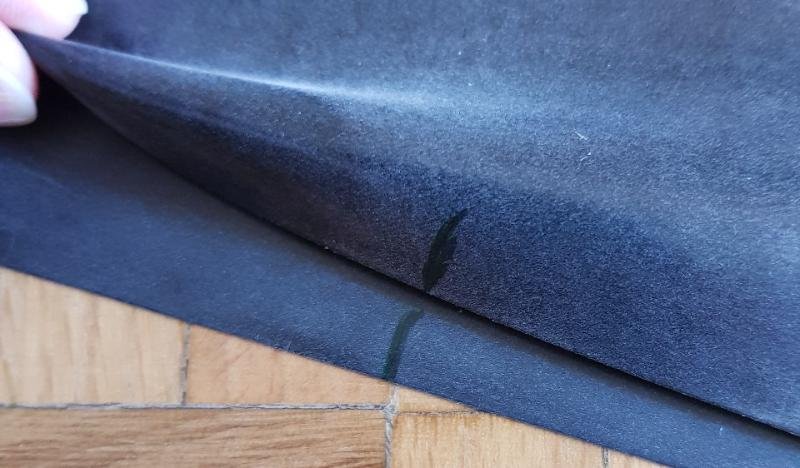
I couldn’t find white, but neon green ended up visible.
► BREATHING MASK x1 – The glues and solvents are not safe to breathe. If you’re not in a well-ventilated area, you’ll need a fabric doctor’s mask. Cheap or free.
► CLAMPS x4 – Used to hold together the end of the latex where people get into the bed. I bought 1 pack of 4 clamps.
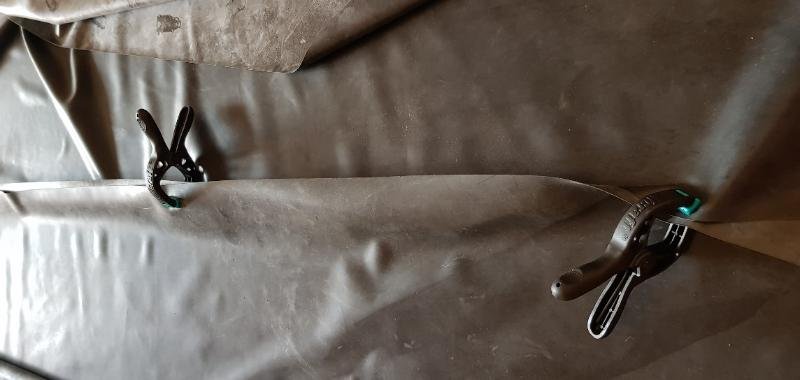
Clamps are for the end of the bed, but useful for construction too.
► LONG RULER OR ROD – This is to roll within the end section of latex to help keep the air in.
► A VACUUM – I’m assuming you have one. Otherwise, the bed won’t work. If not, BORROW one.
COST OF MATERIALS
Here’s the accumulation of what I spent (in Euros). Note that Euros use commas instead of decimals. So 26,00 you can imagine 26.00 for dollar currency.
Bought in person at various stores:
- 26,00 – all pipes, fitting, and valve
- 9,89 – simple saw for pipe cutting
- 6,59 – metal file
- 6,99 – plastic clamps
- 14,25 – rotary cutter
- 32,00 – basic drill
- 1,50 – metal drill bit 5mm
- 1,00 – one bag of cotton balls
- 9,99 – seam roller (on Amazon)
Bought online from Latexpermeter:
- Glue = 60ml bottles x2 (8.95 each)
- Solvent = 60ml bottles x2 (7.95 each)
- Plus shipping and taxes for a total of 59,96
Bought online from RadicalRubber:
- Latex 6 meters = 45,30
- Plus shipping = 25,00
- Plus taxes = 15,00
- Note that I bought 10 meters (extra for a second project) so I recalculated based on latex JUST for a vacuum bed – 6 meters gives you plenty of length for the bed PLUS a little extra to cut your reinforcement pieces out of and a few practice strips.
GRAND TOTAL = 243 Euros and change …BUT…
If you can borrow the drill, drill bits, file, and saw PLUS find a way to get your glue and solvent locally (and avoid those shipping costs), you can save a SIGNIFICANT amount of money – upwards of 130 Euros and cutting your bill in half.
HOW TO ASSEMBLE YOUR BED
1. FILE OFF BITS

Take off any serial numbers, sharp seams, or pointy bits along your pipes and fittings. This makes sure there are less “chances” something will rip or puncture your latex – it’s going to be put under pressure after all. Be sure to do this outside or over a sheet because it can get messy.
2. ASSEMBLE FRAME
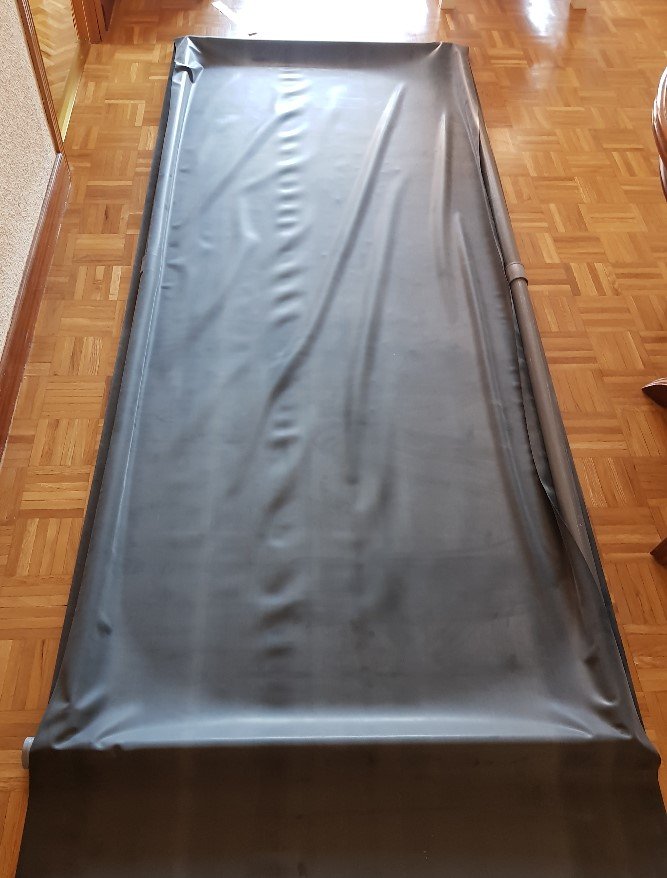
Put it all together to make sure things fit well and secure. Remember, double checking before serious construction or alterations is NEVER a bad thing.
You also need to do this because you have to lay the latex over the frame to check that the width of your frame leaves enough room for your “latex envelope” to go over without resistance.
3. DILL HOLES
Along all pipes, drill evenly spaced holes (how many is up to you) so you have enough points of ventilation to suck out the air when the bed is turned on.
4. GLUE LATEX
Here’s the hard and time-consuming part. If you’ve never worked with latex before, DO A COUPLE PRACTICE SEAMS FIRST with the extra latex you bought.
- Work in small sections at a time (I stayed around the length of a credit card). It might take longer but it will be easier to work with the latex.
- Clean off both sides of the latex that will be glued (with your solvent). It will roll and pucker. This is normal and will go back to the regular shape when it dries.
- Apply a small blob of glue to your card or applicator.
- Run a thin, even layer of glue along your seam (around 1.5cm wide)
- Let dry for a minute (trust me this is important)
- Slowly and carefully lay the seams together and gently pat down
- Run the roller along the seam (a little pressure, but don’t press too hard) to get out any air bubbles.
- Repeat until you have the sides glued down.
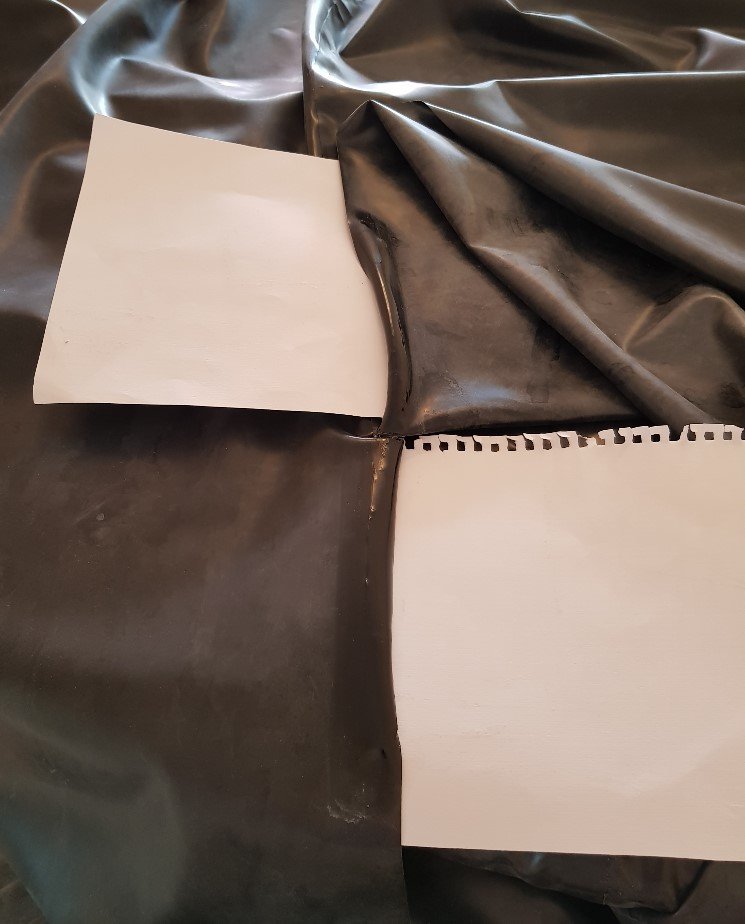
I added paper under the latex so I didn’t get excess glue on the rest of the bed.
I would use a thin cutting board next time instead.
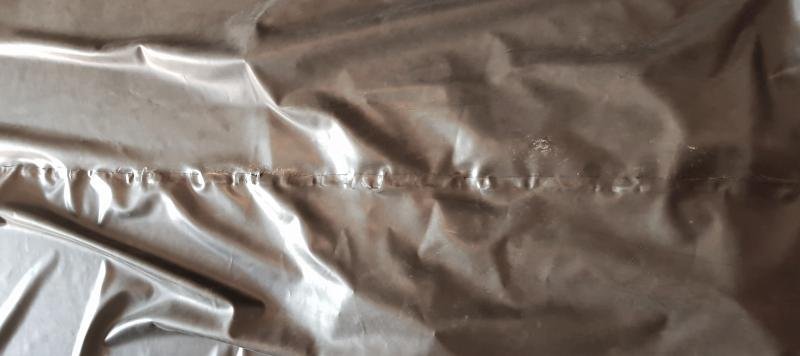
The first side was puckered because I didn’t let the glue dry before laying the seams.
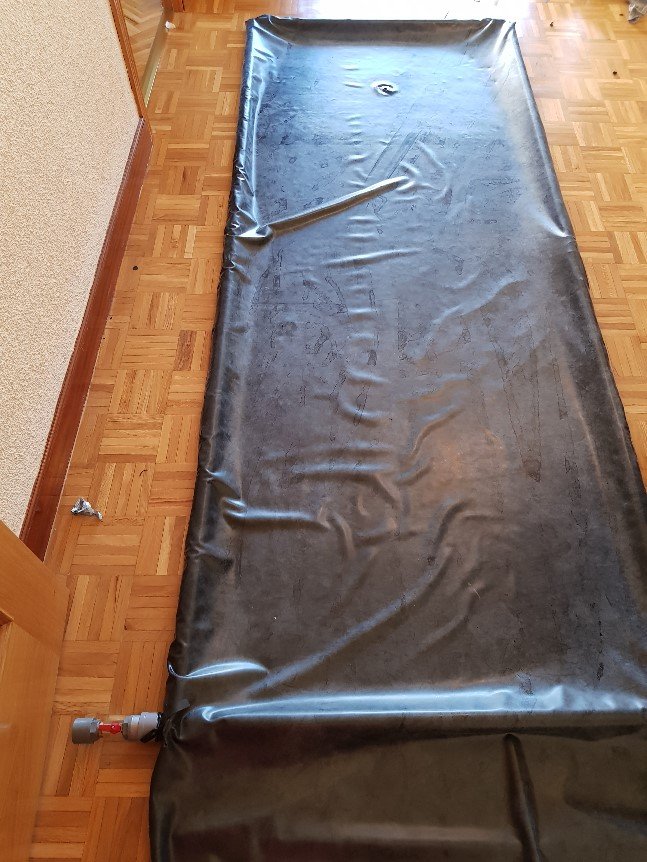
The finished latex. The left is the first side I glued.
You can clearly tell the difference when letting the glue dry a little before laying the seams.
5. CUT OUT HOLES
Estimate where you would like your breathing hole. Cut a small hole of around 1 cm. The, find where the latex meets the T fitting (where the end sticks out and the value attaches) and carefully cut another hole of around 1.5 to 2cm. Keep your cuts as clean as possible and try to avoid any angled parts or extra micro cuts into the latex (which could cause it to rip).
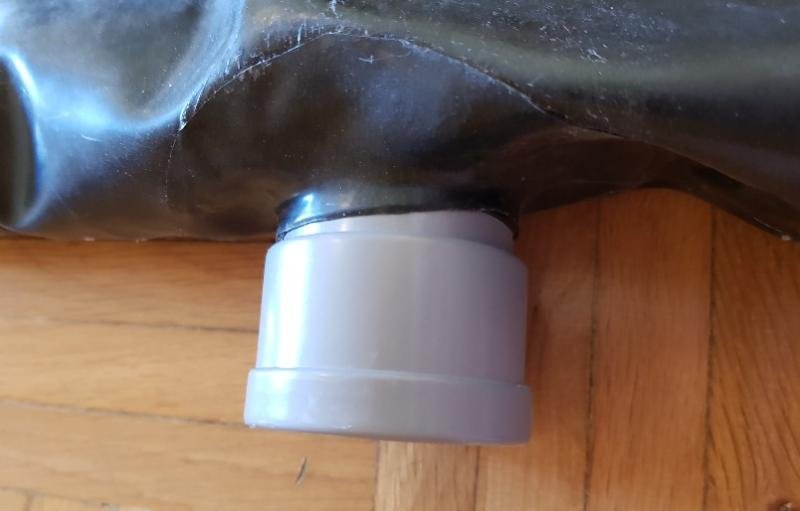
My original value hole was 2cm – too big and air came out (even though it looked and felt tight enough)
6. GLUE ON REINFORCEMENT PATCHES
Cut out circles larger than the breathing hole and the valve hole. Then, cut a hole on the inside of each circle that is the same size of the original holes. Glue these patches over the holes – this will make sure that nothing rips while you use the bed.
When everything is glued, I would leave it for a day to be on the safe side.
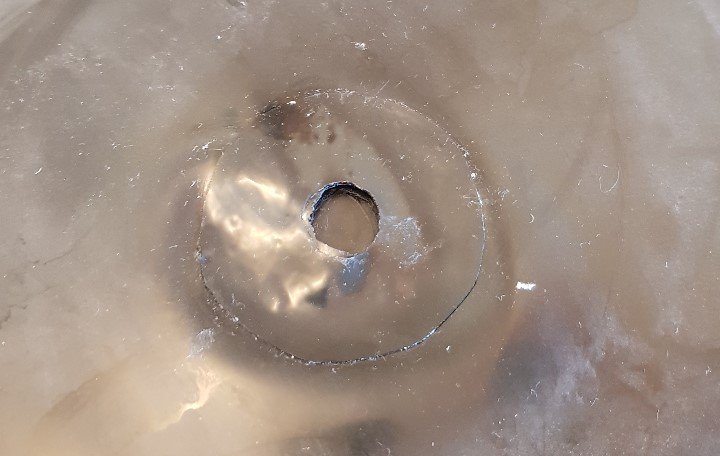

I also reinforced the top edges to help manage any stress from the vacuum.
7. HAVE YOUR FIRST TEST RUN
Your first test should not be with a person. Use pillows or a blanket roll and stuff it inside. Suck out the air, turn off the value, and see if air escapes and deal with the issue accordingly. After that, you can test with a person.
LEARN FROM MY MISTAKES & OBSERVATIONS
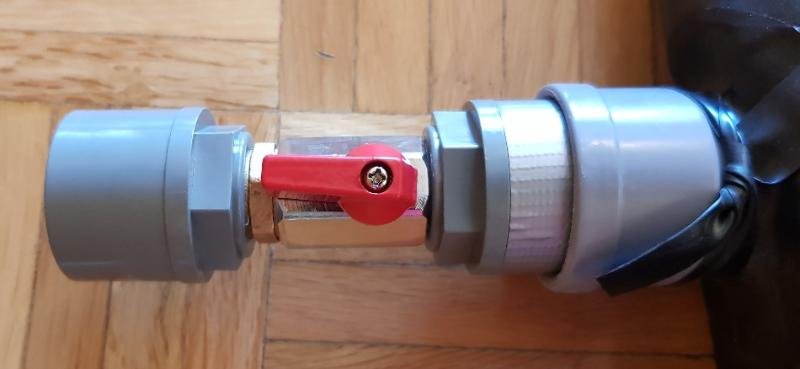
- The hole for the value end was a bit too big – it went on securely but the air ended up coming out a little. I had to tie it off with another piece of latex. Make your hole smaller than I did (at least in relation to whatever size value you get.
- I cut the top section of my latex sheet to make things easier to handle, if you can avoid this, I would try to keep it intact. This way you’ll save a bit of extra time and materials.
- Don’t bother with paint brushes to apply the glue – it’s a pain in the ass.
- Squeeze bottles to apply the glue to your applicator are a godsend.
- Pump bottles – the kind used in nail salons – will be much easier to help you get the solvent out (don’t leave the solvent uncapped or it will start to evaporate).
- Buy a long ruler or rod to wrap up with the end section – this makes it harder for the air to get out.
- Make sure the holes are pointed directly into the center of the bed or pointed down slightly. If you point them up, the latex will block the holes and it will be harder to take all the air out.
- Get a breathing tube to go into the breathing hole. It makes it easier to breath BUT your model can also tilt their head to the side to avoid pressure on the nose while the bed is on.
- Note that turning the bed ON/OFF many times to compensate for air loss will make the person inside VERY uncomfortable and dizzy.
- Do NOT wash off the powder that comes with the latex when shipped. I washed mine and didn’t have a way to unstick the latex after it dried. I had to find baby powder and re-powder it just so it was workable again. You can clean it and polish it AFTER you assemble it.
- Apply silicone lube to the person getting into the bed first – makes it easier to wiggle in.
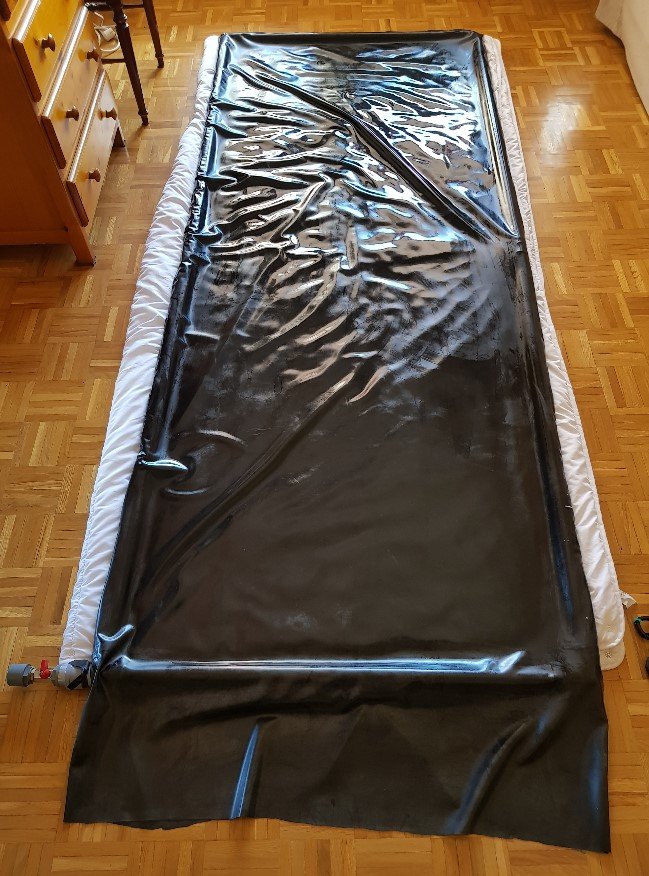
Here’s the final product after polishing. Not the prettiest, but very functional.
FINAL THOUGHTS
Even with all the little bumps, I still feel things turned out great – yes, I did spend more money than anticipated, but that was because I wanted it done asap (rather than wait to hunt down free materials). Also, you are more than welcome to alter the materials and measurements based on whatever frame dimensions you want to work with.
Want more useful articles? Check out these…
Feel free to leave any comments!


 Anal Beads
 Anal Vibrators
 Butt Plugs
 Prostate Massagers
 Alien Dildos
 Realistic Dildos
 Kegel Exercisers & Balls
 Classic Vibrating Eggs
 Remote Vibrating Eggs
 Vibrating Bullets
 Bullet Vibrators
 Classic Vibrators
 Clitoral Vibrators
 G-Spot Vibrators
 Massage Wand Vibrators
 Rabbit Vibrators
 Remote Vibrators
 Pocket Stroker & Pussy Masturbators
 Vibrating Masturbators
 Cock Rings
 Penis Pumps
 Wearable Vibrators
 Blindfolds, Masks & Gags
 Bondage Kits
 Bondage Wear & Fetish Clothing
 Restraints & Handcuffs
 Sex Swings
 Ticklers, Paddles & Whips


